


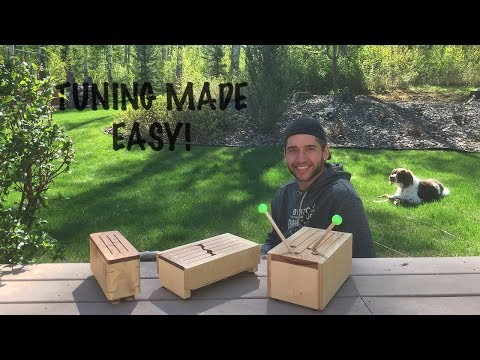
About the tongue drum
A tongue drum (or slit drum) is a hollow wooden box with tongues cut into the top; each tongue rings at its own pitch when you strike it with a mallet. Most guides just tell you to cut some slots. This one, by Colin of the I Kinda Wanna Learn blog and YouTube channel, shows you how to aim for chosen notes from the start.
You pick your notes, look up their frequencies, and use the bar-vibration formula (or the author's free length calculator, in millimetres or inches) to work out each tongue's length. The box is built with the bottom left open so you can reach the tongues to tune them: taking material off the tip raises the pitch, and taking it off the base lowers it. Once you're happy, the bottom goes on, ideally screwed rather than glued so you can retune later.
Who it's for. Woodworkers who can build a simple box and want a melodic percussion instrument. A drill, a jigsaw and a tuner app will get you there; nicer joinery (mitres with splines, dovetails or finger joints) is up to you.
Good to know. The author recommends ⅝–¾″ thick wood for the tongues on a larger drum, thinner for small ones, and rubber feet under the finished drum to improve the sound. This is a summary of his guide and video; we haven't built one ourselves.
What you'll need
Materials
- Hardwood boards for the box; ⅝–¾″ for the top if you're making 8 or more tongues
- Wood glue (and screws for the bottom, so you can retune)
- A finish such as tung oil
- Rubber feet
Bought parts
- Mallets (or make your own)
Tools
- A drill and a jigsaw
- A Forstner bit, or another way to remove material for tuning
- A tuner or tuner app
- Clamps and basic woodworking tools
Build overview
Our own outline of the guide. Follow the full write-up and calculator links on the I Kinda Wanna Learn blog.
- Plan the notes. Choose the notes and look up their frequencies, then calculate each tongue length with the formula or the author's calculator.
- Build a box. Make a box whose top caps the end pieces (doubled in thickness), with the end grain vertical and the bottom left open.
- Cut the tongues. Lay out the pattern on the top, drill start holes and cut the slits with a jigsaw, ending at the inner edge of the end piece.
- Tune. Measure each tongue's frequency. Remove material from the tip to raise the pitch, or from the base to lower it.
- Finish. Screw or glue the bottom on, add rubber feet, sand and finish.
Video
 Play video: Tutorial, part 2: tuning with the length calculator (loads YouTube)
The videos don't load from YouTube until you press play. Video thumbnails are © their creators.