
About the Tin Whistle
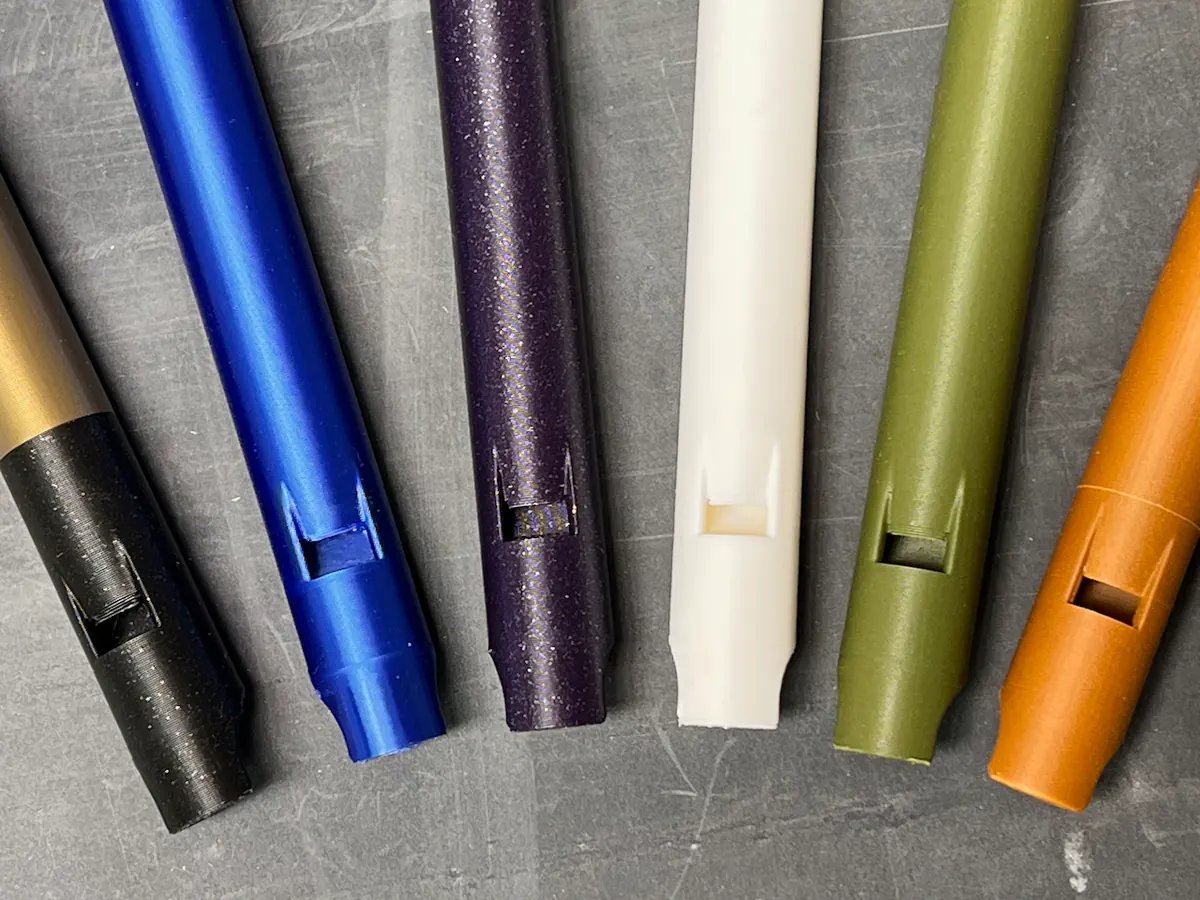
A tin whistle (penny whistle) in D for folk and Irish music. It prints in two pieces and fits together with no glue and nothing to buy. The tone holes have flat tops for comfortable finger cover. A split-ring silencer covers the labium for quiet practice, and there's a display stand. Standard PLA works, but the designer says stiffer filaments make it more responsive. Turn on scarf seams in Bambu Studio for a smoother bore; the supplied profile is set up for them.
Most of the long page is a careful post-print clean-up guide. Make sure the bore is clear, and clean stringy bits from the finger holes without enlarging them. The labium is the fragile sharp edge that makes the sound, and a tiny bit of support is attached to it. Push it inward, gently, without touching the edge itself. Then clear the windway (hold it up to the light and slide paper or a toothpick through), remove the brim and test the mouthpiece on its own before assembling.
About the video. It's a maker's video, not the designer's. It shows a low whistle printed from this model, possibly scaled up, so the sound and size may differ from the standard D whistle.
What you'll need
Printed parts
- Whistle (2 pieces)
- Optional: split-ring silencer and display stand
Bought parts
- Nothing
Tools
- Craft knife or needle file
- A pen, dowel or pipe cleaner for the bore
- Paper or a toothpick for the windway
Build overview
- Print. Print both pieces with the supplied profile, with scarf seams if your slicer has them.
- Clear the bore and holes. Remove loose bits from the bore, and clean the finger holes without enlarging them.
- Free the labium. Push the small support into the whistle without touching the edge.
- Clear the windway. Check it against the light and clear any debris.
- Test and assemble. Remove the brim, test the mouthpiece on its own, then fit the two pieces together.
Print settings
- Material: PLA; stiffer filaments are better
- Seams: Scarf seams (Contour and Hole) in Bambu Studio
- Profile: Supplied print profile
Video
 Play video: 3D-printed low whistle (a maker's print of this model, possibly scaled) (loads YouTube)
Nothing loads from YouTube until you press play. Video thumbnails are © their creators.
Photos
More of the designer's photos are on MakerWorld. See them on MakerWorld ↗