
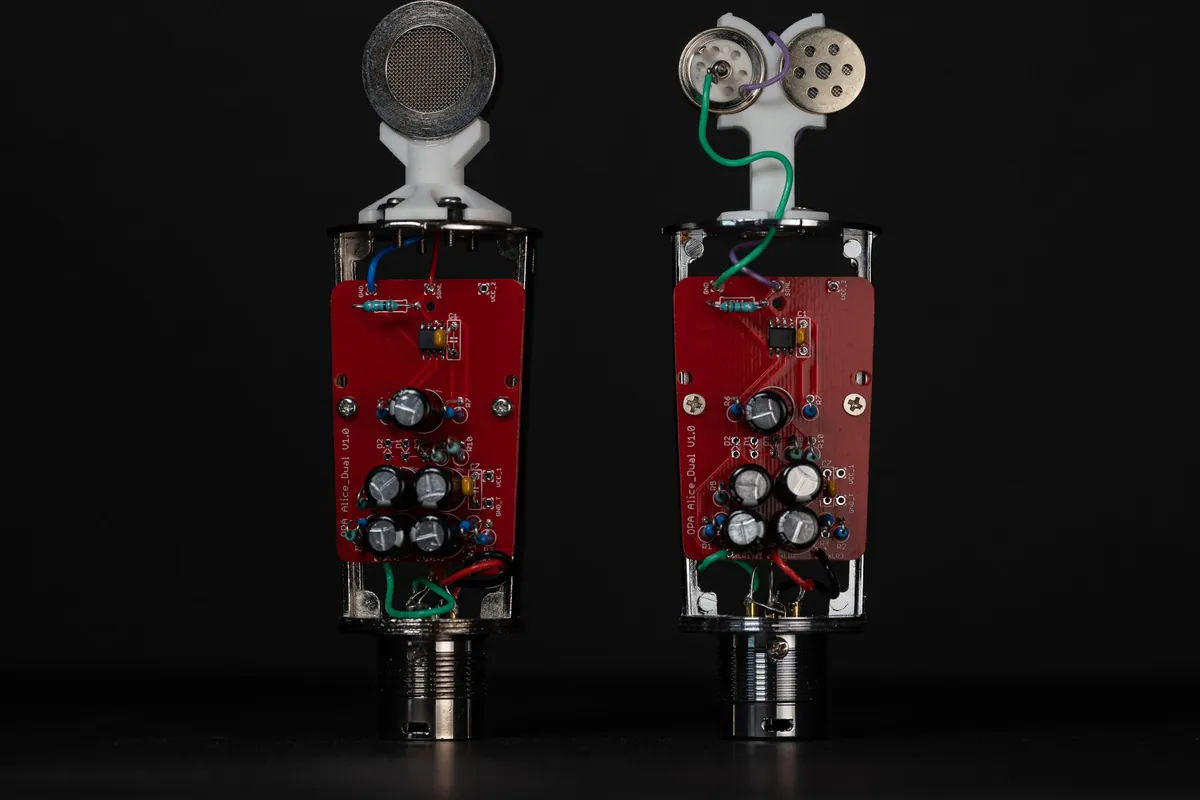
About the OPA Alice microphones
Jules Ryckebusch (DJJules) builds microphones for musician friends and studios. Here he replaces the poor electronics in a cheap BM-800 condenser mic with a quiet impedance converter built around a dual op-amp, and pairs it with a TSB2555B electret capsule. The mic runs on standard phantom power from your interface or mixer.
The guide explains the circuit section by section, including RF filtering at the XLR connector. The circuit board was designed by a colleague and is shared on PCBWay under CC BY-SA, so you can order it there; the Instructable includes the schematic, a board drawing and an Excel parts list. Everything except the op-amp chip is through-hole.
He then builds two mics: a standard cardioid, which he calls great for vocals, and a figure 8, which picks up sound from the front and back and which he says solves some sound-isolation problems when recording. A troubleshooting PDF added in 2022 covers common mistakes.
Who it's for. Home-studio musicians who can solder and want a much better mic than the donor body alone. This page summarises the author's guide; we haven't built one ourselves.
What you'll need
Materials
- A BM-800 or BM-700 microphone to use as the body
Bought parts
- A TSB2555B electret capsule (or a figure-8 capsule)
- The OPA Alice circuit board (a CC BY-SA shared design you can order from PCBWay)
- The op-amp and parts from the author's parts list
- 2 × 22 nF capacitors for the XLR connector
- M2.5 screws, small rubber grommets and E6000 glue
- Optional: a capsule saddle
Tools
- A soldering iron with a fine tip and flux
- A screwdriver
- A multimeter for troubleshooting
- An audio interface or mixer with phantom power
Build overview
Our own outline. The schematic, parts list, troubleshooting PDF and build video are on Instructables.
- Build the board. Tack and solder the op-amp chip first, then the through-hole parts.
- Strip the donor mic. Unscrew the BM-800, remove its board and capsule, and keep the screws and XLR connector.
- Prepare the XLR. Solder the two 22 nF capacitors to the connector and add short colour-coded wires.
- Mount the capsule. Glue the capsule to its saddle and fit grommets to damp handling noise.
- Assemble and test. Fit the board and capsule into the body, connect phantom power and test, using the troubleshooting guide if needed.
Videos
 Play video: The full build (loads YouTube)
 Play video: A recording made with these mics (loads YouTube)
Nothing loads from YouTube until you press play. Video thumbnails are © their creators.