


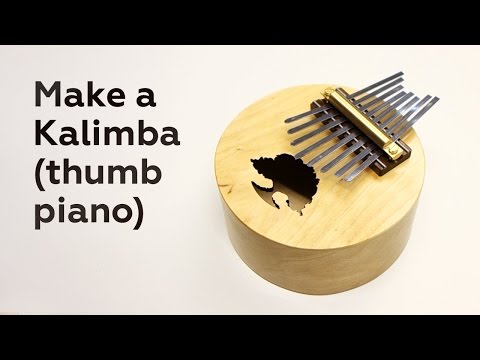
About the kalimba
This is a proper boxed kalimba, not a toy. The body is a short cylinder: a solid-wood top and bottom about 5 mm thick, joined by thin plywood sides that are steam-bent around a form. A sound hole in the top lets the resonating chamber breathe, and a hardwood grounding bar with a brass pressure rod clamps the tines in place.
The tines are the clever part. Many makers cut them from an old metal rake; Switch & Lever found that a spring-steel drain-cleaning strip works just as well, cut to length with the ends rounded for comfort. The grounding bar is held on with machine screws into threaded inserts rather than wood screws, so it can be tightened and removed without wearing out the thin top.
Who it's for. Woodworkers who'd like a satisfying weekend-or-two project. The author used a lathe, bandsaw, table saw, disc sander and router, but says the parts can be made by hand with more patience, and that plywood can stand in for the solid-wood top and bottom.
Tuning. You tune by sliding each tine in or out and checking it with a guitar tuner or a phone app. The author's eight tines are tuned to a simple octave. This is a summary of the Instructable and video; we haven't built one ourselves.
What you'll need
Materials
- Thin plywood for the steam-bent sides
- A wooden board (or 5 mm plywood) for the top and bottom
- Hardwood such as walnut for the grounding bar
- Brass rod stock for the pressure bar and tine rests
- Spring-steel strip for the tines (a rake tine or drain-cleaning strip)
- Varnish, glue, screws and threaded inserts
Tools
- Bandsaw or coping saw
- A pot and a simple home-made steamer (or a steam iron)
- Disc sander or sandpaper; a router with a flush-trim bit
- Optional: a lathe for the stepped shoulders and the grounding bar
- A tuner or tuner app
Build overview
Our own outline of the 20 steps. Follow the full instructions and photos on Instructables.
- Top and bottom. Cut two discs about 5 mm thick and turn a small stepped shoulder on each to locate the sides.
- Steam-bend the sides. Build a simple steamer over a pot of boiling water and bend two thin plywood slats around a cylinder.
- Glue up the body. Glue one slat to the bottom, then glue the second, slightly larger slat inside it as reinforcement.
- Close the body. Cut a sound hole in the top, glue it on and flush-trim the edges with a router.
- Make the grounding bar. Shape a walnut bar, mount it with machine screws into threaded inserts, and add a brass pressure rod.
- Tines, finish and tune. Cut and round the spring-steel tines, varnish the body, reassemble, and tune each tine by sliding it in or out.
Video
 Play video: The build video (loads YouTube)
The videos don't load from YouTube until you press play. Video thumbnails are © their creators.