
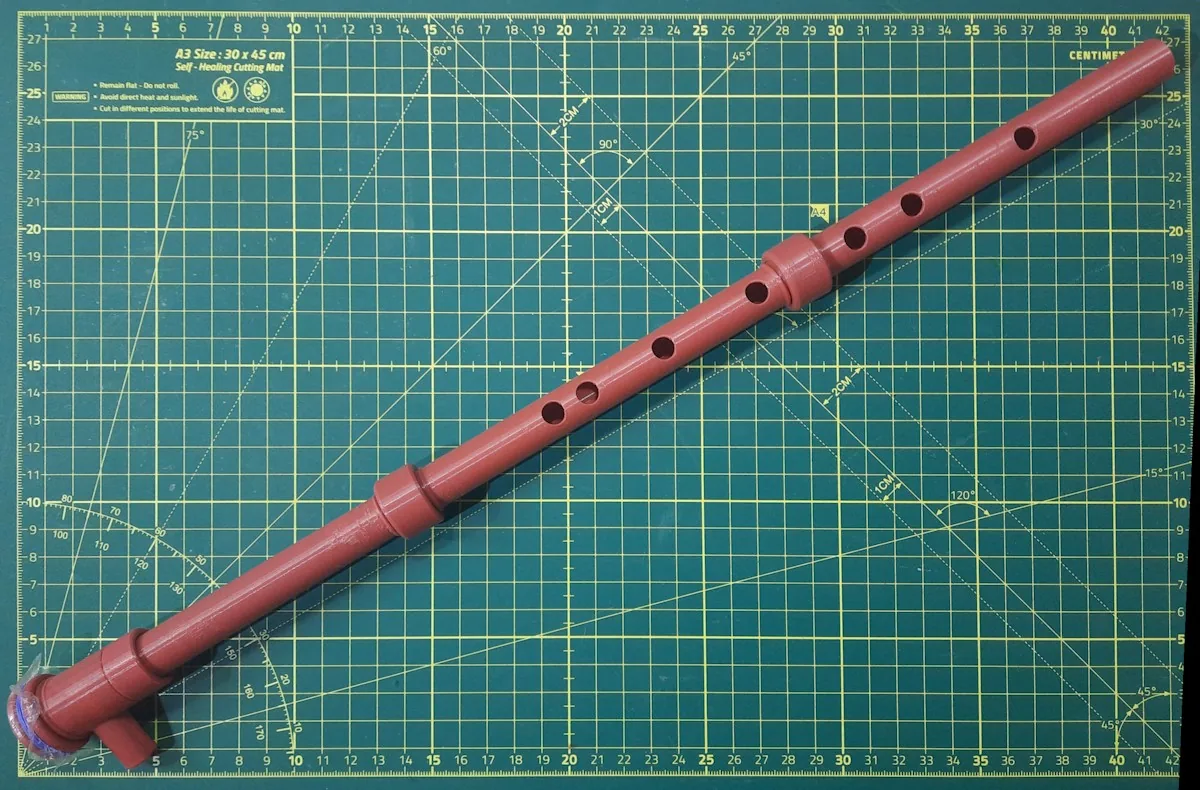
About the Membrane Clarinet
A membrane clarinet (Linsay Pollak calls his a membrane reed foonki) makes its sound with a thin plastic sheet instead of a cane reed. You blow into the side of the mouthpiece, and the membrane flutters against the end of the inner tube. The note you get depends on the first open hole on the chanter. Most homemade versions use PVC pipe and drilled holes. DrJones wanted one that's entirely printed, so there's nothing to buy except a scrap of plastic and a rubber band.
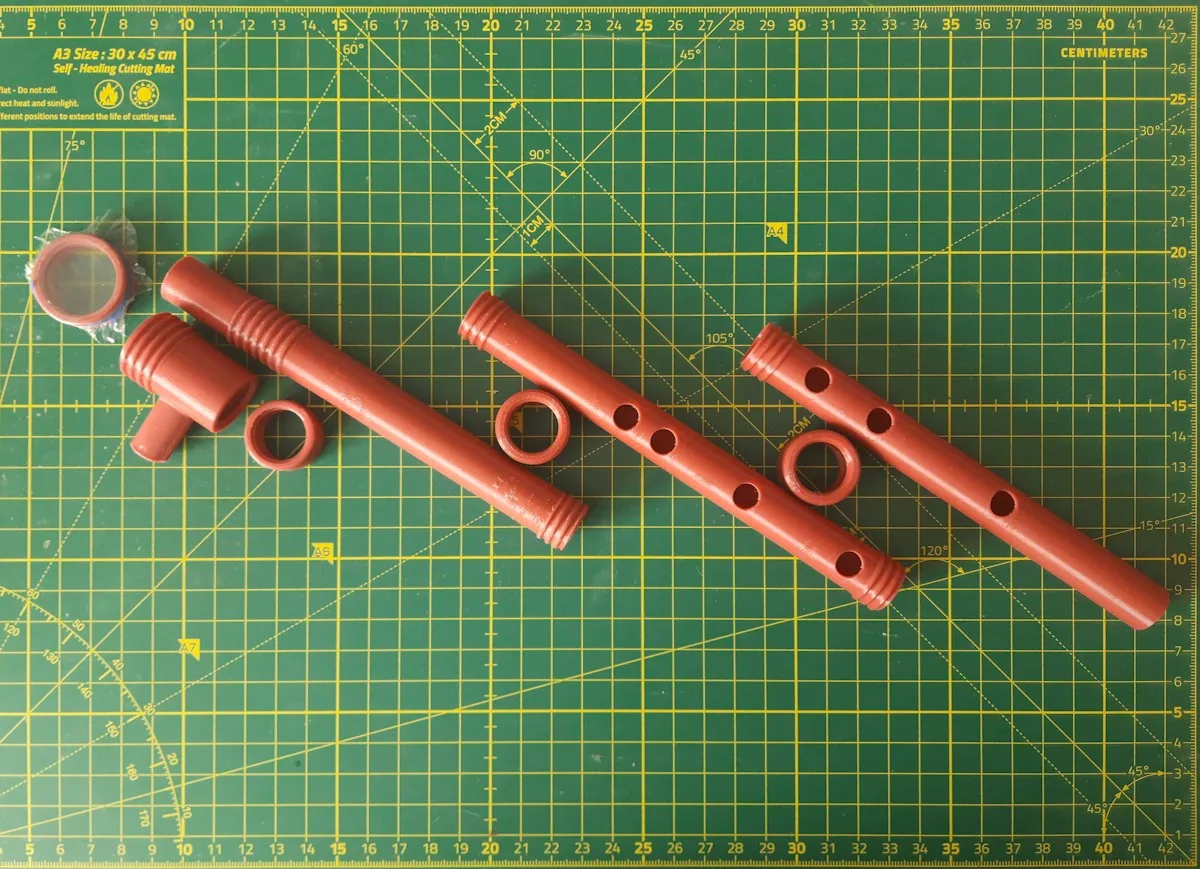
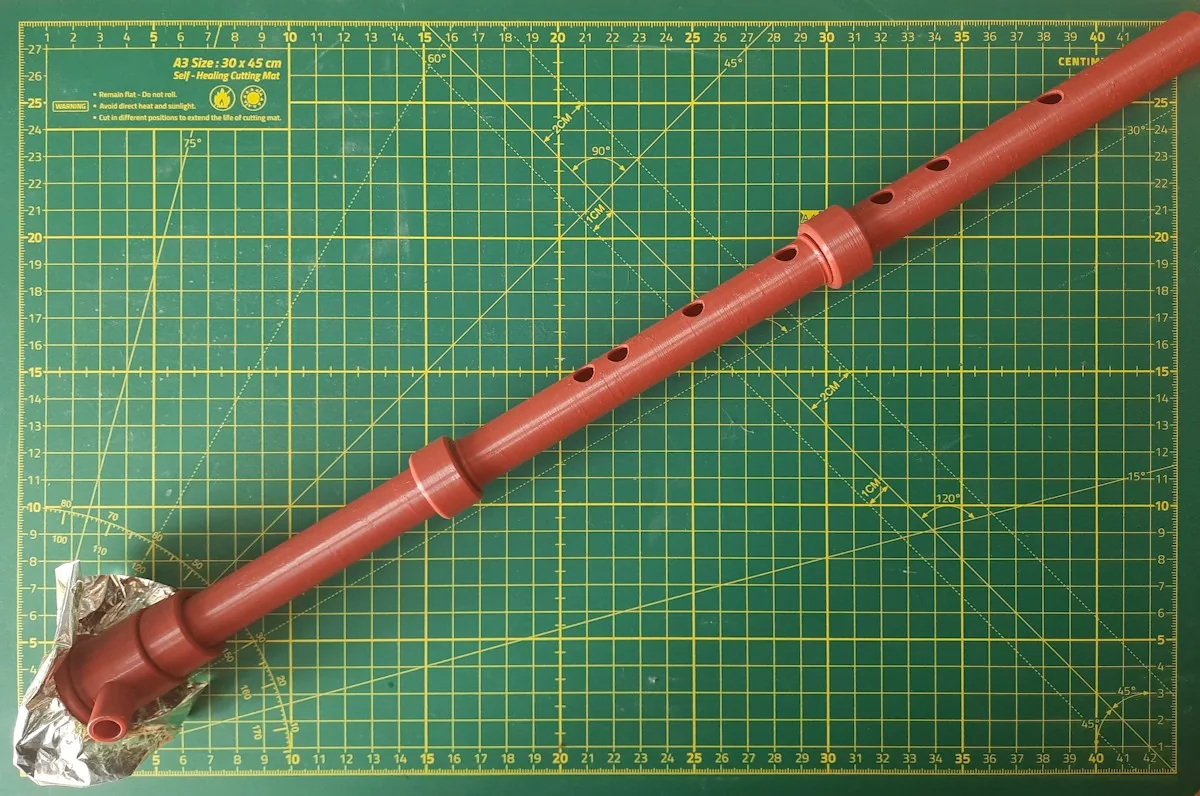
It's a different design from the PVC Membrane Clarinet in the library, which needs a length of PVC pipe. DrJones took the dimensions from Linsay Pollak's video and was inspired by Nicolas Bras's membrane clarinet. The tube is split into three parts so it fits a Prusa MINI. The pieces screw together with a left-hand and right-hand thread combination, so you can twist them to line up the holes and lock them.
Who it's for. It's a good, quick project for anyone curious about how reed instruments work, and a fun one for classrooms and maker clubs. You don't need any woodwind experience to get a sound out of it, though getting a nice tone takes some fiddling with the membrane.
Sound and playability. It plays roughly in E major, and you can bend notes by half-covering holes. The lowest hole is a stretch for the little finger. DrJones says he isn't a musician, so the demo is a fair, unpolished example of what it can do. We haven't built one ourselves, so treat this page as a summary of the designer's page, not a review.
What you'll need
Printed parts
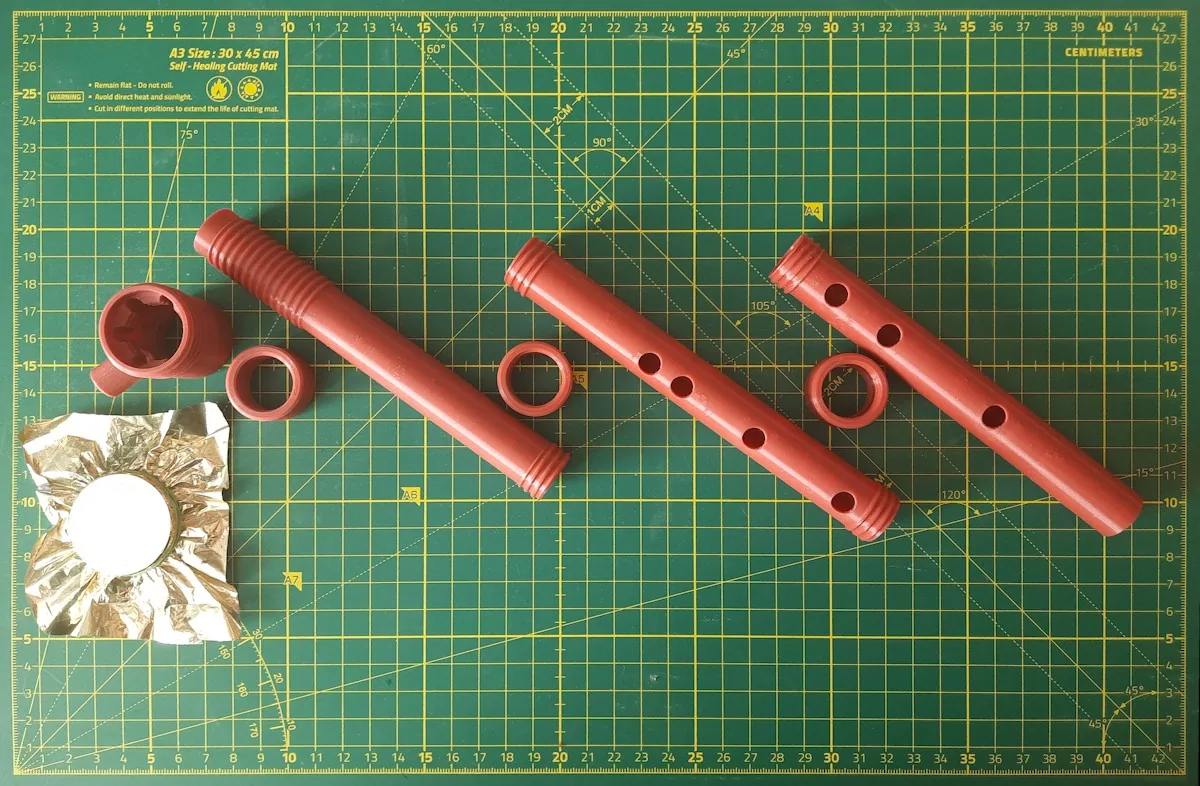
- The mouthpiece and membrane holder
- The membrane ring, which screws on to set the tension
- Three chanter (pipe) sections, in the thin or the wide version
- Clamp nuts to join the pipe sections, and a lock nut for the mouthpiece
Bought parts
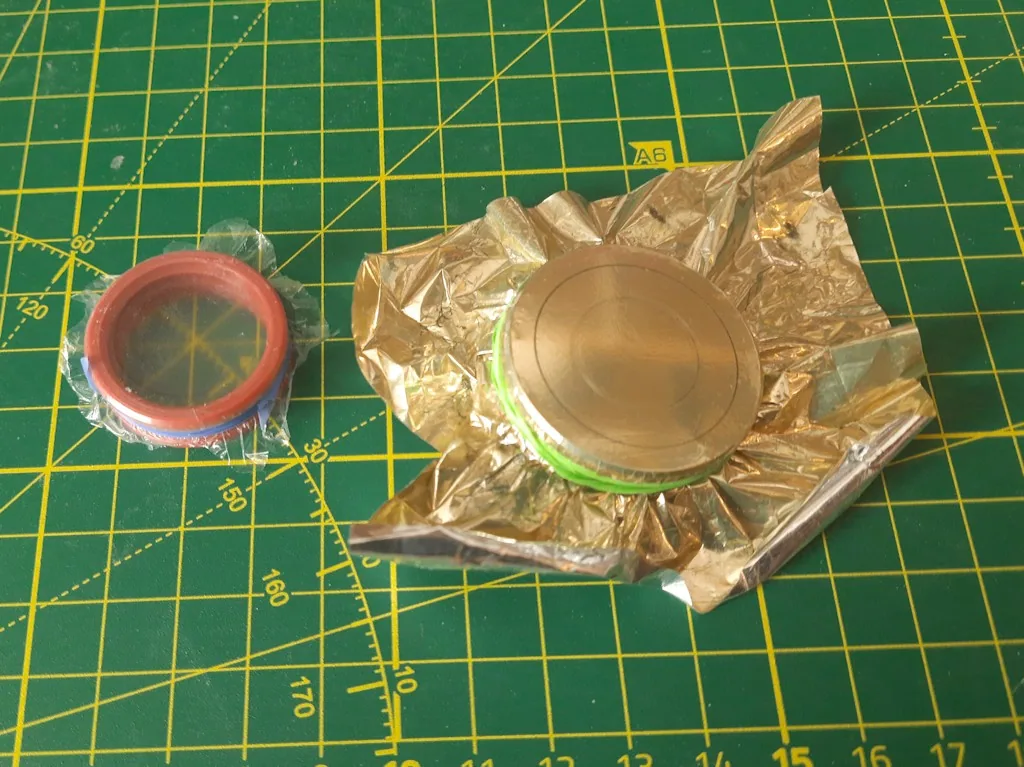
- A sheet of thin plastic: a plastic bag, space blanket or other stiff film. The designer found nitrile gloves didn't work
- A rubber band
Tools
- A 3D printer; it fits a Prusa MINI
- A slicer with paint-on supports and organic (tree) supports, or the designer's 3MF file
- Scissors
Build overview
Our own outline of the designer's instructions. The full notes and pictures are on the Printables page.
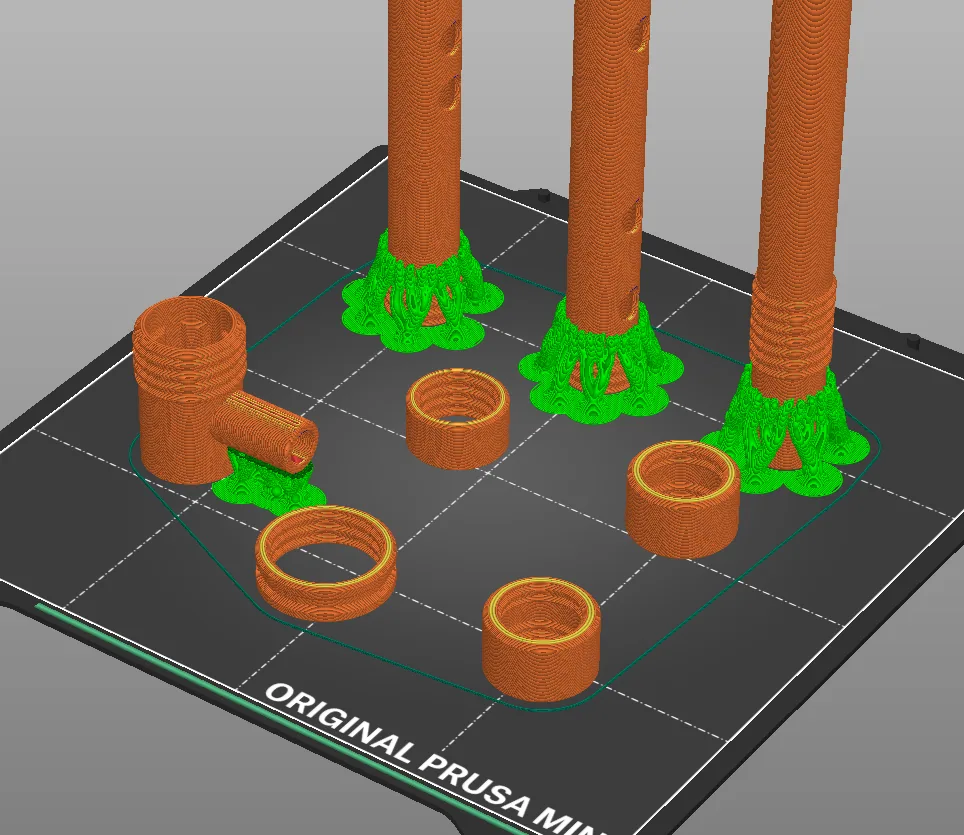
- Print the parts. Either use the 3MF, or split the assembled STL into objects. Turn the mouthpiece upside down and paint a ring of support around each tube a few centimetres above the plate.
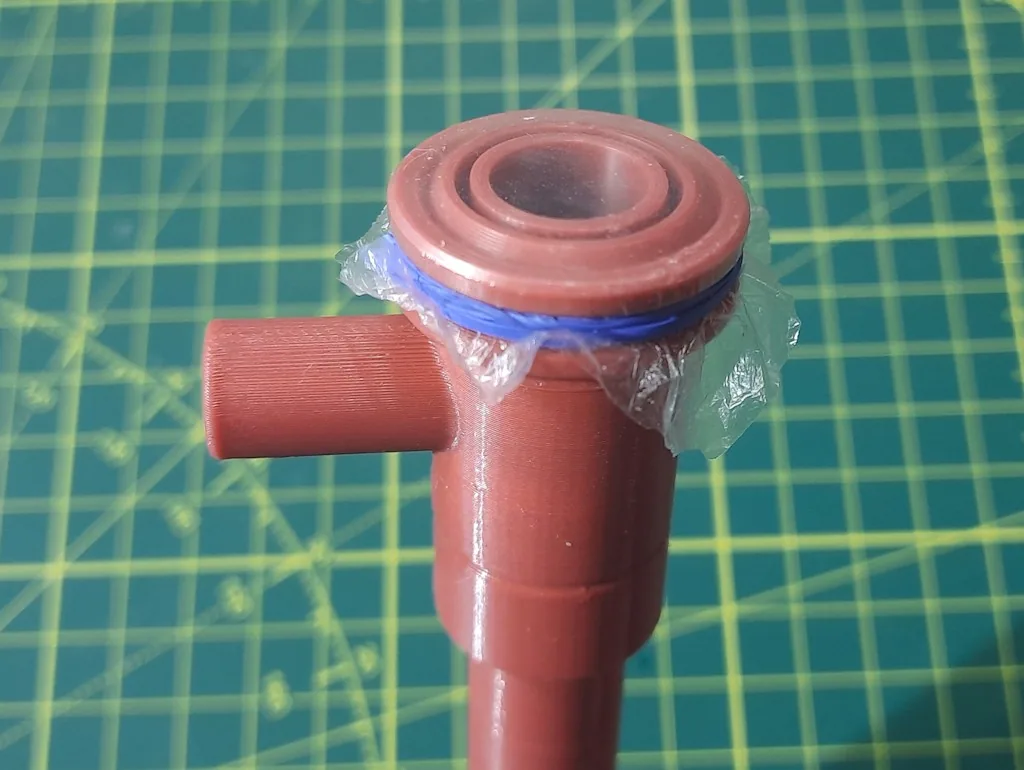
- Fit the membrane. Cut a piece of thin plastic, stretch it over the membrane ring and hold it on with a rubber band.
- Screw it together. The clamp nuts (the ones with some threads missing inside) join the short threads on the pipe pieces. One side is left-handed, so if a nut won't go on, turn it round. The lock nut fixes the first pipe piece to the mouthpiece.
- Adjust and play. Screw the inner tube in or out and tighten or loosen the membrane ring until it sounds. The note depends on the first open hole.
Print settings
- Material: PLA
- Nozzle and layer height: 0.4 mm nozzle, 0.2 mm layers
- Supports: Paint-on supports as a ring around each tube; organic (tree) supports for the mouthpiece
- Bed size: Split into three tube sections to fit a Prusa MINI
Tuning and troubleshooting
The membrane holder gives you two adjustments. You can screw the inner tube in or out so it sticks out more or less, and you can screw the membrane ring to change the tension. Tension also changes the pitch.
- Notes far off pitch: the membrane is probably too loose.
- Hard to blow: the membrane is too tight, or the tube sticks out too far.
- Air but no sound: the inner tube isn't sticking out far enough.
- Half notes: open a hole only slightly. With practice and a well-adjusted membrane, you can play quite expressively.
Summarised from the designer's Printables description.
Video
 Play video: 3D-printed membrane clarinet (loads YouTube)
Nothing loads from YouTube until you press play. Video thumbnails are © their creators.
Photos
All photos: DrJones, from the design page on Printables, licensed CC BY. We resized them and converted them to WebP.