
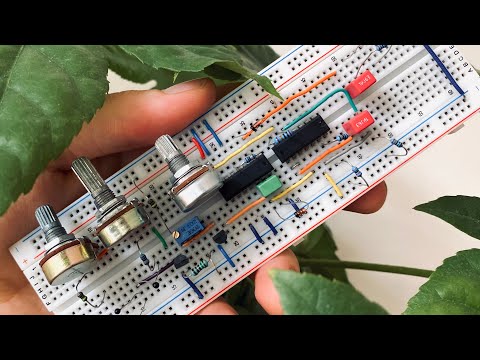
About the DIY VCO series
Moritz Klein makes some of the clearest videos anywhere on analog synth design. In this series, made with Latvian synth maker Erica Synths, he builds a voltage-controlled oscillator (VCO), the part of a synthesizer that makes the actual tone, starting from nothing and explaining every component choice as it goes.
He wanted a baseline design that's as simple as possible while still being musically useful. The result is an analog sawtooth-core oscillator with reasonably accurate volt-per-octave tracking, built from a handful of basic parts: a TL074 op-amp, a couple of transistors, diodes, thermistors and passives. You follow along on a breadboard, so you can experiment and hear what each change does.
The manual and the kit. Erica Synths publishes a free 59-page manual with the full schematic, bill of materials, breadboard layouts, calibration notes and appendices on components, tools and soldering. It was written for their paid DIY kit (PCB, front panel and parts for a Eurorack module), but the kit is optional: you can learn the whole design on a breadboard with generic parts, and only buy the kit if you want a finished module.
Who it's for. People who want to understand synthesizers, not just assemble one. You'll need a breadboard, jumper wires, two 9 V batteries with clips and ideally a multimeter. This is a summary of the series and manual; we haven't built one ourselves.
What you'll need
Bought parts
- Generic parts from the manual's bill of materials: a TL074 op-amp, BC548 and BC558 transistors, diodes, 10k thermistors, resistors, capacitors, potentiometers and jacks
- A solderless breadboard and jumper wires
- Two 9 V batteries with clips (for breadboard power)
- Optional, paid: the Erica Synths DIY VCO kit, if you want a finished Eurorack module
Tools
- A multimeter
- Optional: a soldering iron, if you build the module
- An amplifier or audio interface to listen
Build overview
Our own outline of the series. Work through the videos with the free manual beside you.
- Set up a breadboard. Gather the generic parts, a breadboard, jumper wires and two 9 V batteries.
- Build the core. Part 1 builds the analog oscillator core that makes the sawtooth wave.
- Add control. Parts 2 to 4 add the exponential converter (for volt-per-octave pitch control), keep it in tune as it warms up, and shape the sawtooth into a square wave.
- Calibrate. Use the manual's calibration notes to get it tracking in tune.
- Optional: make it a module. If you bought the kit, solder it onto the PCB and fit it in a Eurorack case using the manual's assembly appendix.
Video
 Play video: Part 1: the oscillator core (loads YouTube)
The videos don't load from YouTube until you press play. Video thumbnails are © their creators.