
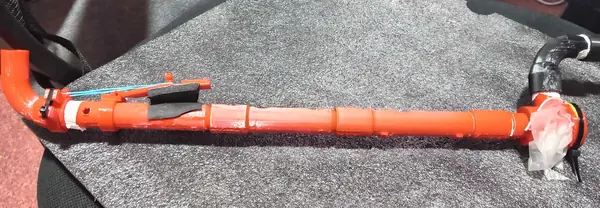
About the Membrane-reed crumhorn
The crumhorn is a Renaissance capped double-reed instrument with a buzzy voice and a curved 'J' shape. Cane reeds are fiddly, so this design uses a membrane reed instead: a thin square of latex stretched over the mouthpiece. It flutters as you blow, like a valve, a technique popularised by a well-known membrane-instrument maker. The sound is buzzy and reedy, somewhere between a duduk and a crumhorn.
The tube is three segments that friction-fit together, and their rotation matters. Two tone holes sit inside joints and vent through windows in the tenons, so line them up by holding the tube to the light. For the same reason, don't seal loose joints with PTFE tape; glue them or reprint the tenons slightly larger. One 90° bend sets the blowing angle. Print a second for the foot if you want the classic curved look; without it, it's a straight pipe that plays just as well. An optional nozzle steadies the note, and optional OpenSCAD files add a key for the lowest hole.
The designer's README is long and thorough. Follow it for the membrane tension and tuning.
What you'll need
Printed parts
- 3 tube segments
- Mouthpiece
- Split clamping ring
- Optional wind-cap nozzle
- 2 × 90° bends (one is optional)
- Optional key and tone-hole insert (OpenSCAD source)
Bought parts
- Latex sheet (a roughly 50 mm square)
- Zip ties
- An elastic band (for fitting the membrane)
Tools
- Knife
Build overview
- Print the parts. Print the tube segments diagonally, holes up; print the split ring on its flange and trim the flange off.
- Assemble the tube. Push the segments together, clocking them so every tone hole lines up.
- Fit the membrane. Stretch latex over the mouthpiece rim, snug but not drum-tight, then clamp it with the split ring and a zip tie.
- Add the bends. Fit the mouthpiece and the bend, plus the second bend at the foot if you want the curve.
Print settings
- Material: PLA
- Layer height: 0.2 mm
- Perimeters: 3
- Tube segments: Diagonal, tone holes up